Mostly following the tutorial and adding on a few extra touches here and there the torso and up was just a procedure of blending it right with each bone a lot of bones are included in this area so a lot of vertices will have multiple bones having some effect to them. i began by sectioning areas and blending them until i was satisfied with the results you just blend it following up the spine.


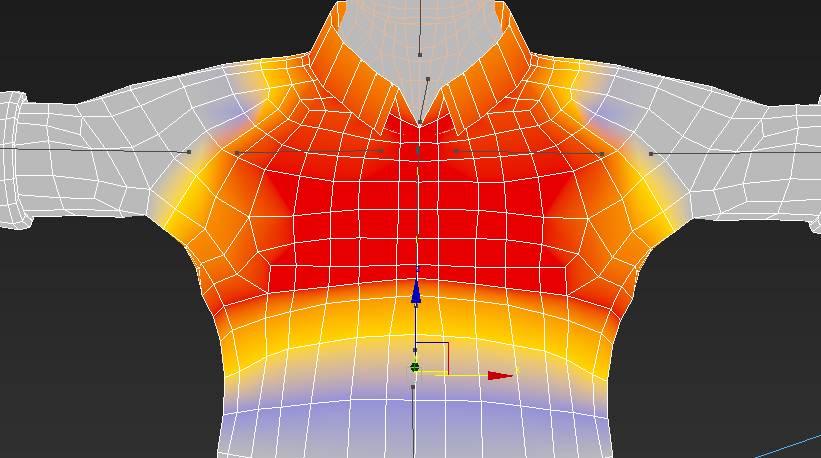
the chest area again i began by sectioning it off, then blending it appropriately so that it can interact well with the stomach area and the shoulders, i wasn’t too harsh on the blending because its just little movement need from this section for the arm raise because most of it comes from the clavicle bone, i played the animation a few times until i was satisfied with my results and i moved on too the clavicle and shoulder to arm bone.


i find this the cleanest way of working I’ve been talking to some of my peers and they have been trying the paint weighting option but that creates a lot of ptoblems for example vertices digging into the mesh changing the shape of movement and all sorts so i find that this is a cleaner way of way and much more basic and less stressful sectioning off bones to 100% and then blending it to other bones


When I started working with the shoulder I noticed that the when the zombie raised his arm and lowered it completely it would collide and dig inside it looked a right mess but it just looks tricky I had a go at using the paint weights tool for this one to go around the armpit area it gave it a nice blend and stopped the dig and for the arm raise I selected vertices around and weighted them from the top of the arm to half way where the shirt fold is it has a nice blend and the arm raise was smooth.
the arm was tricky but i figured it out by ringing vertices and moving the weight affect until it was looking good because the default movement involves an impossible twist so it was hard to get the weighting right because it involved changing the weighting to individual vertices.Where he twists his arm was hard getting right when the arm twists the whole arm twists but because he has a shirt you wouldn’t be able to see the whole twist movement just from when where there’s bare skin it would need influence from hand and the bones from the upper arm and lower arm light weighting from the upper arm the lower arm just weight it whilst at its extreme pose and weight it till it looks appropriate then weight it from the hand bone too but just a light effect.


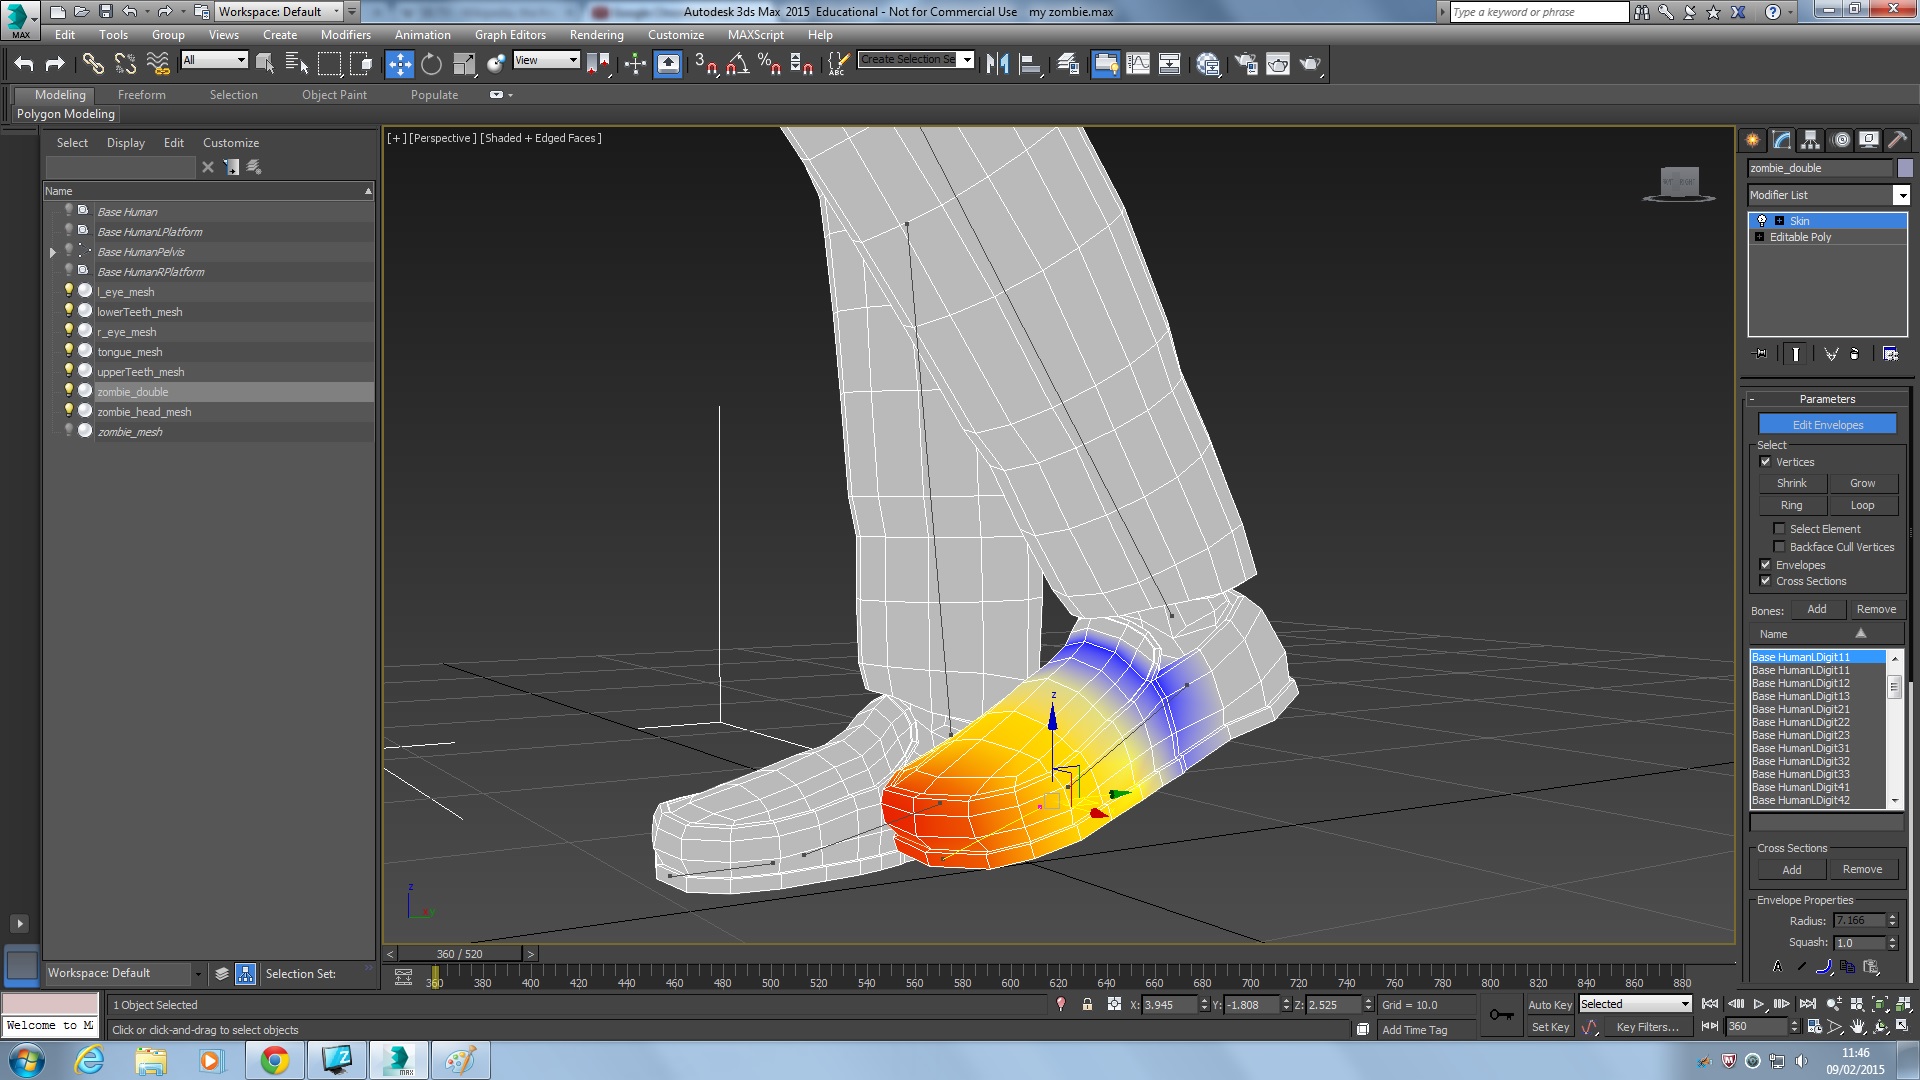
The fingers where tricky you would need a lot of different camera angles because it’s quite deceiving when you at looking at it through one angle like I did with all the rest I weighted the vertices 100% in sections then began blending it by ringing the vertices and weighting them but once I played the animation I noticed that from a different angle I was actually squashing the fingers flat so it was vital to check different camera angles once this problem was fixed the fingers would roll smooth and spread nice


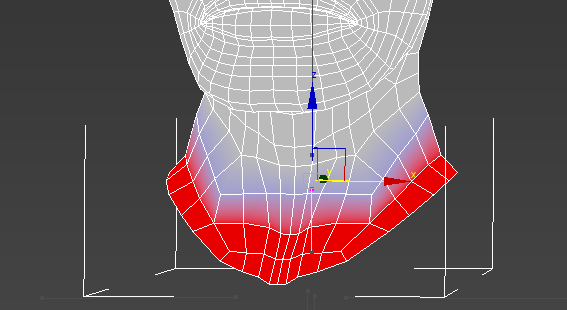
i found this quite because the default skin was not so bad and you have to remember this mesh is of a zombie with a cartoony look so it wont be exactly like a human so it doesn’t have to be so strict, so a little more flex in the movement is good all i did really edit was the neck so that it stayed put and didn’t twist so much.